Access Entry
MCP Introduction
What is MCP?
MCP is a protocol that allows the CodeBuddy IDE to connect with external tools and data sources. It enables the integration of the CodeBuddy IDE with external systems, addressing the issue of toolchain fragmentation in traditional development.

Why Use MCP?
No need to repeatedly explain project structures; integrate directly with external tools, simplifying the workflow.;
Supports development of MCP servers in various programming languages (as long as they can output to stdout or provide HTTP endpoints, such as Python, JavaScript, Go, etc.).
Mode Selection
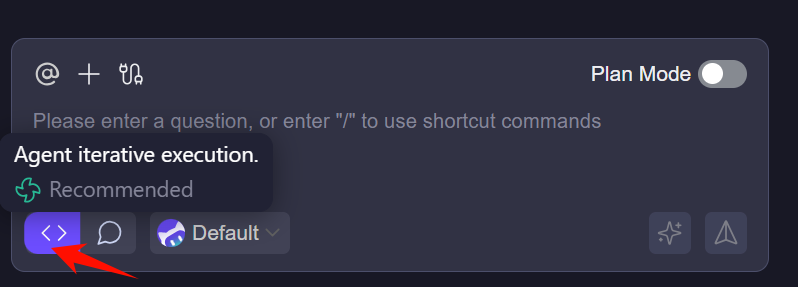
The MCP protocol needs to run within the project context, and the Craft Agent can parse the project structure, understand the project-level context, and perform multi-tasking. Therefore, MCP needs to be applied under the Craft Agent to automatically invoke external services connected via MCP.
Installing MCP Servers
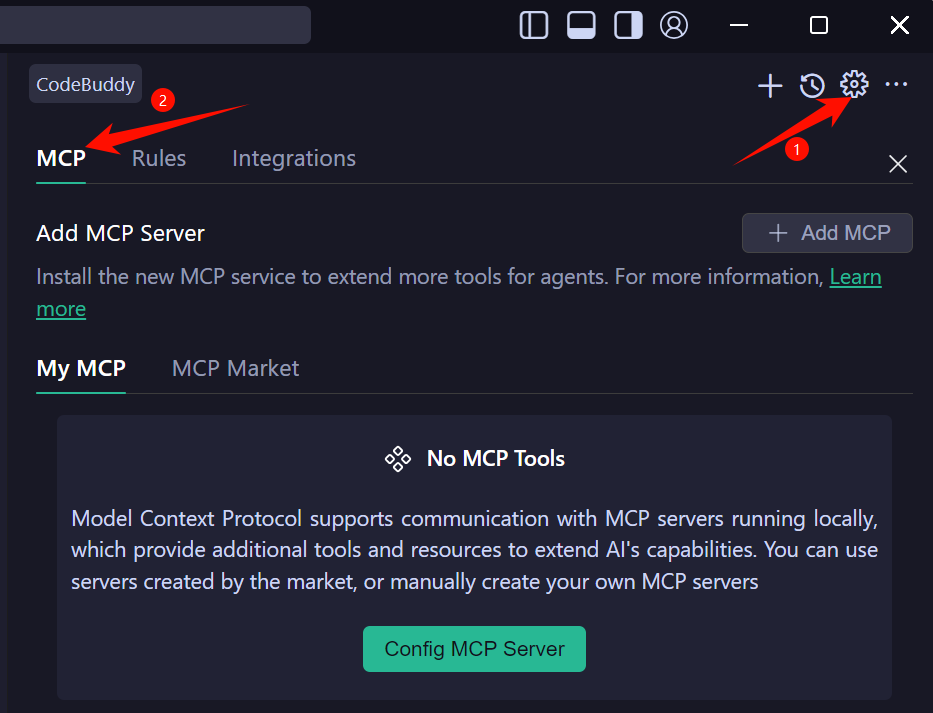
In the top-right corner of the sidebar conversation panel, click CodeBuddy Settings, then switch to the MCP tab.
One-click Installation of MCP Server
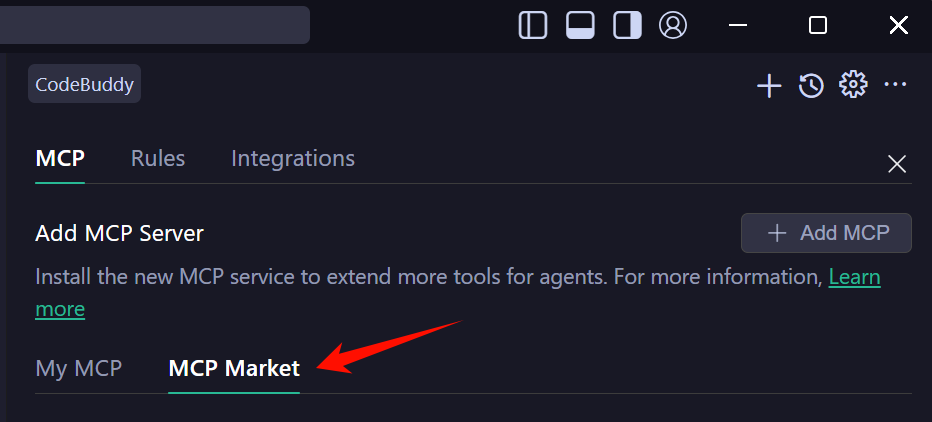
The MCP Market provides a wide range of MCP servers that you can install with one click.
Choose the MCP server for one-click installation according to your actual needs, for example:

Click Install for one-click installation. The Agent will analyze the MCP server and check the dependencies. If the dependencies are not installed, they will be installed automatically. Once installed successfully, the MCP server will show a green status; if the installation fails, it will show a red status.
Custom Installation of MCP Server
In the MCP tab, click Add MCP to add an MCP server.
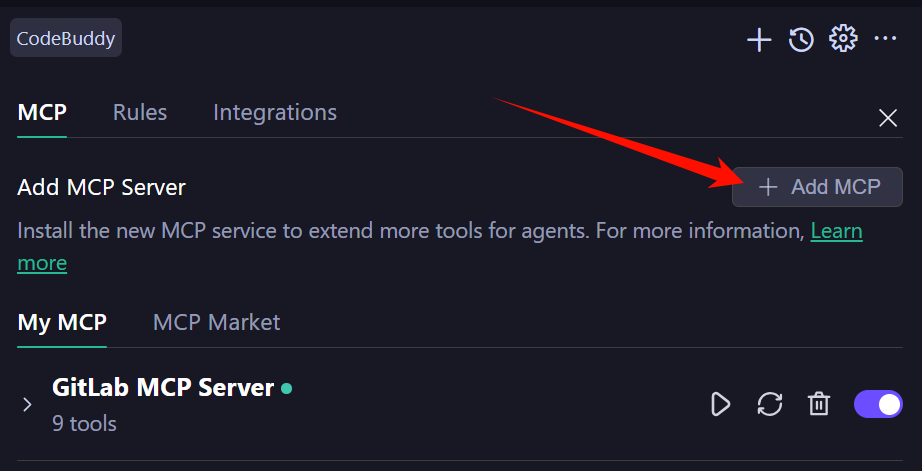
Add the configuration information for the MCP server in the JSON configuration file. For example, for the GitHub MCP server:
 json
json"GitHub MCP Server": { "disabled": false, "timeout": 60, "type": "stdio", "command": "npx", "args": [ "-y", "@modelcontextprotocol/server-github" ], "env": { "GITHUB_PERSONAL_ACCESS_TOKEN": "YOUR_TOKEN" } }
Note:"YOUR_TOKEN" should be replaced with your personal PERSONAL_ACCESS_TOKEN。
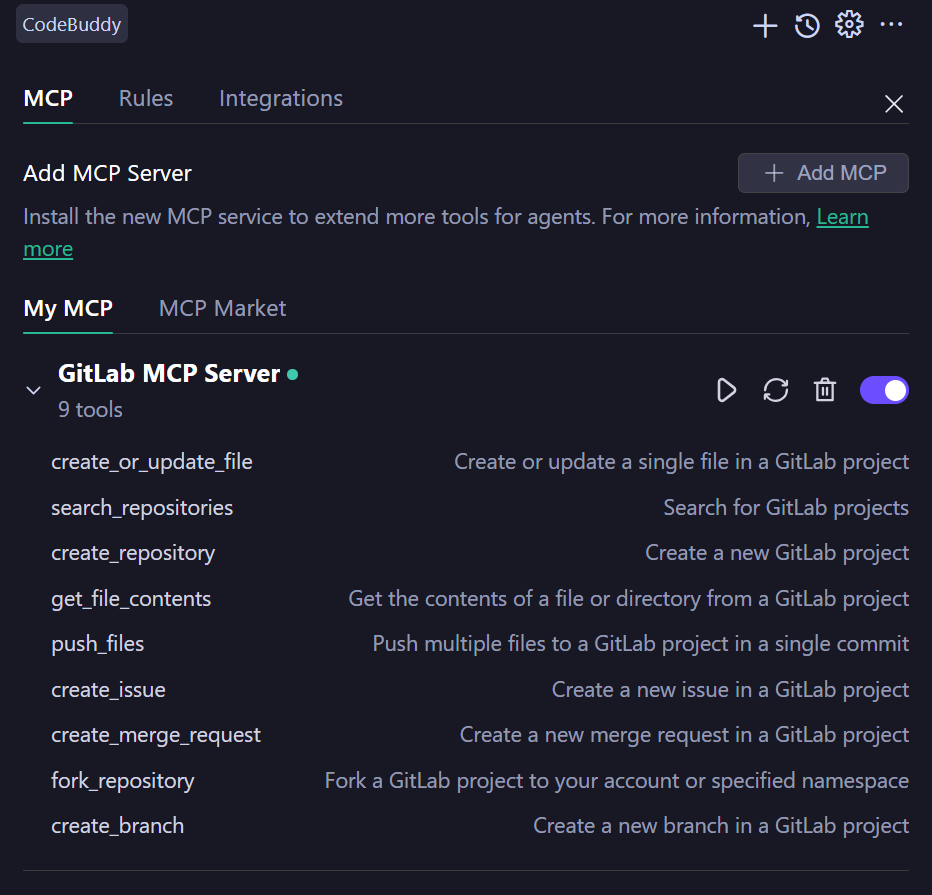
After saving, the MCP servers will be installed automatically. In the My MCP tab, the MCP server list will be displayed. If successful, it will show a green status; otherwise, it will show a red status.
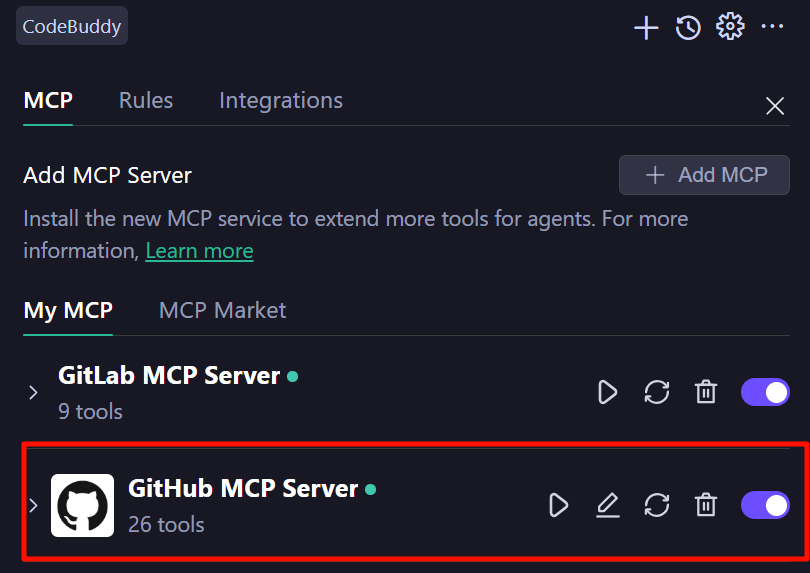
In the MCP servers list, click on the installed MCP server to view the list of tools it provides.
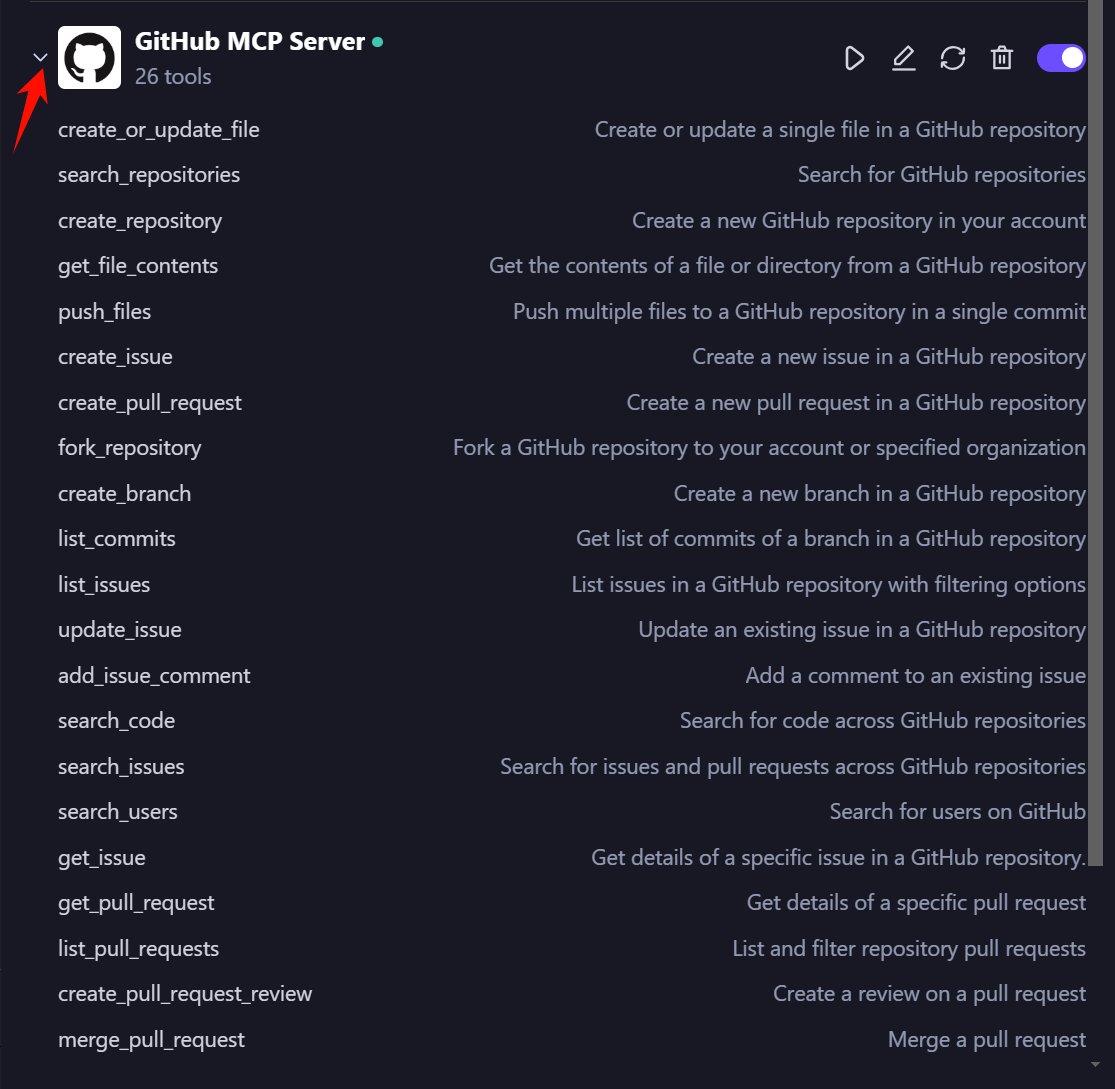
Using MCP Servers
Under the Craft Agent, once you input task requirements, the Agent will automatically invoke the related MCP tools from the tool list. You can also manually specify tools to invoke when entering task requirements.

